
A Google Tag Manager (GTM) server container allows measurement code to run separately from your website using Google Cloud’s secure infrastructure. Moving from client-side tagging to a server-side tagging environment offers three primary advantages:
- First-Party Context & Cookie Durability: Provides an alternative to fragile third-party cookies and protects tracking signals across browsers with strict tracking prevention (such as Safari ITP).
- Improved Site Performance: Heavy third-party measurement scripts run in your cloud server rather than on the user’s browser, reducing JavaScript execution time and speeding up page load speeds.
- Data Privacy & Governance: Client data is intercepted and sanitized before being routed to external vendor endpoints (like Meta, TikTok, or Google), preventing sensitive user details from leaking.
Follow this step-by-step tutorial to create a server container, configure Google Cloud billing, and attach a custom subdomain.
1. Create a Tag Manager Server Container
To use server-side tagging, start by setting up a dedicated container within your Google Tag Manager account:
- Navigate to tagmanager.google.com and sign in with your Google account.
- Click the three vertical dots (⋮) next to your account name and choose Create Container.
- Under Container name, enter a descriptive title (e.g.,
www.yourwebsite.com - Server Container). - Under Target platform, select Server.
- Click Create.
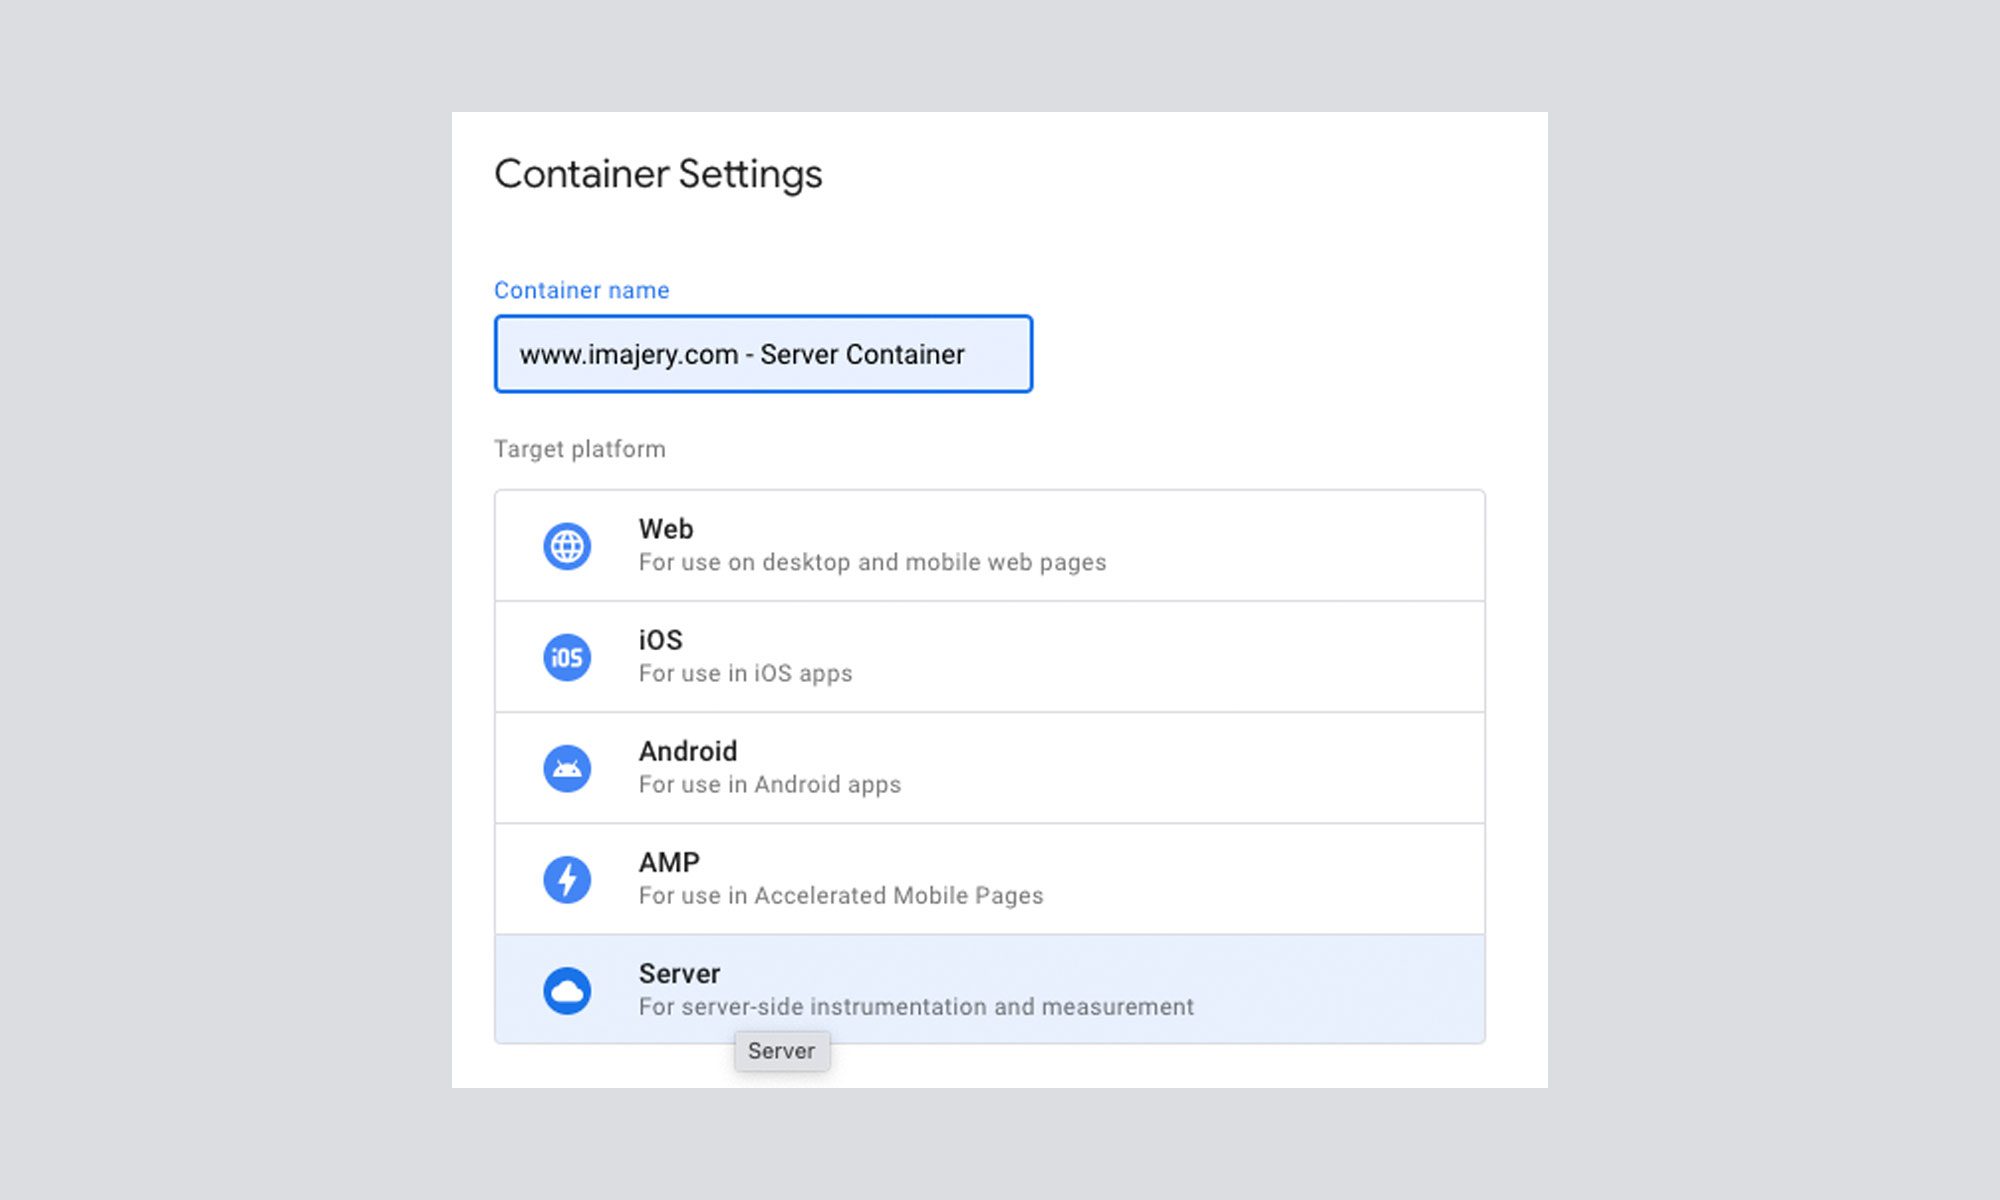
- An Install Google Tag Manager prompt will appear. Click Automatically provision your tagging server.
- In the Create tagging server dialog, select your Google Cloud billing account and click Select billing account and create server. (If you do not have a billing account configured yet, see the next section below).
- Wait for the “Stand by while your server is created” progress bar to finish.
- On the Server Created screen, click Close.
2. Creating a Google Cloud Billing Account
A tagging server typically falls under the free tier of Google Cloud services unless your organization already runs other cloud workloads or your website handles very high traffic volumes.
- In the provisioning dialogue, click Create a billing account.
- In the Name field, enter an identifiable label (such as
"TD Visa"or"Company Corporate Card"). - Select the correct Country to ensure billing in your preferred local currency.
- Click Continue.
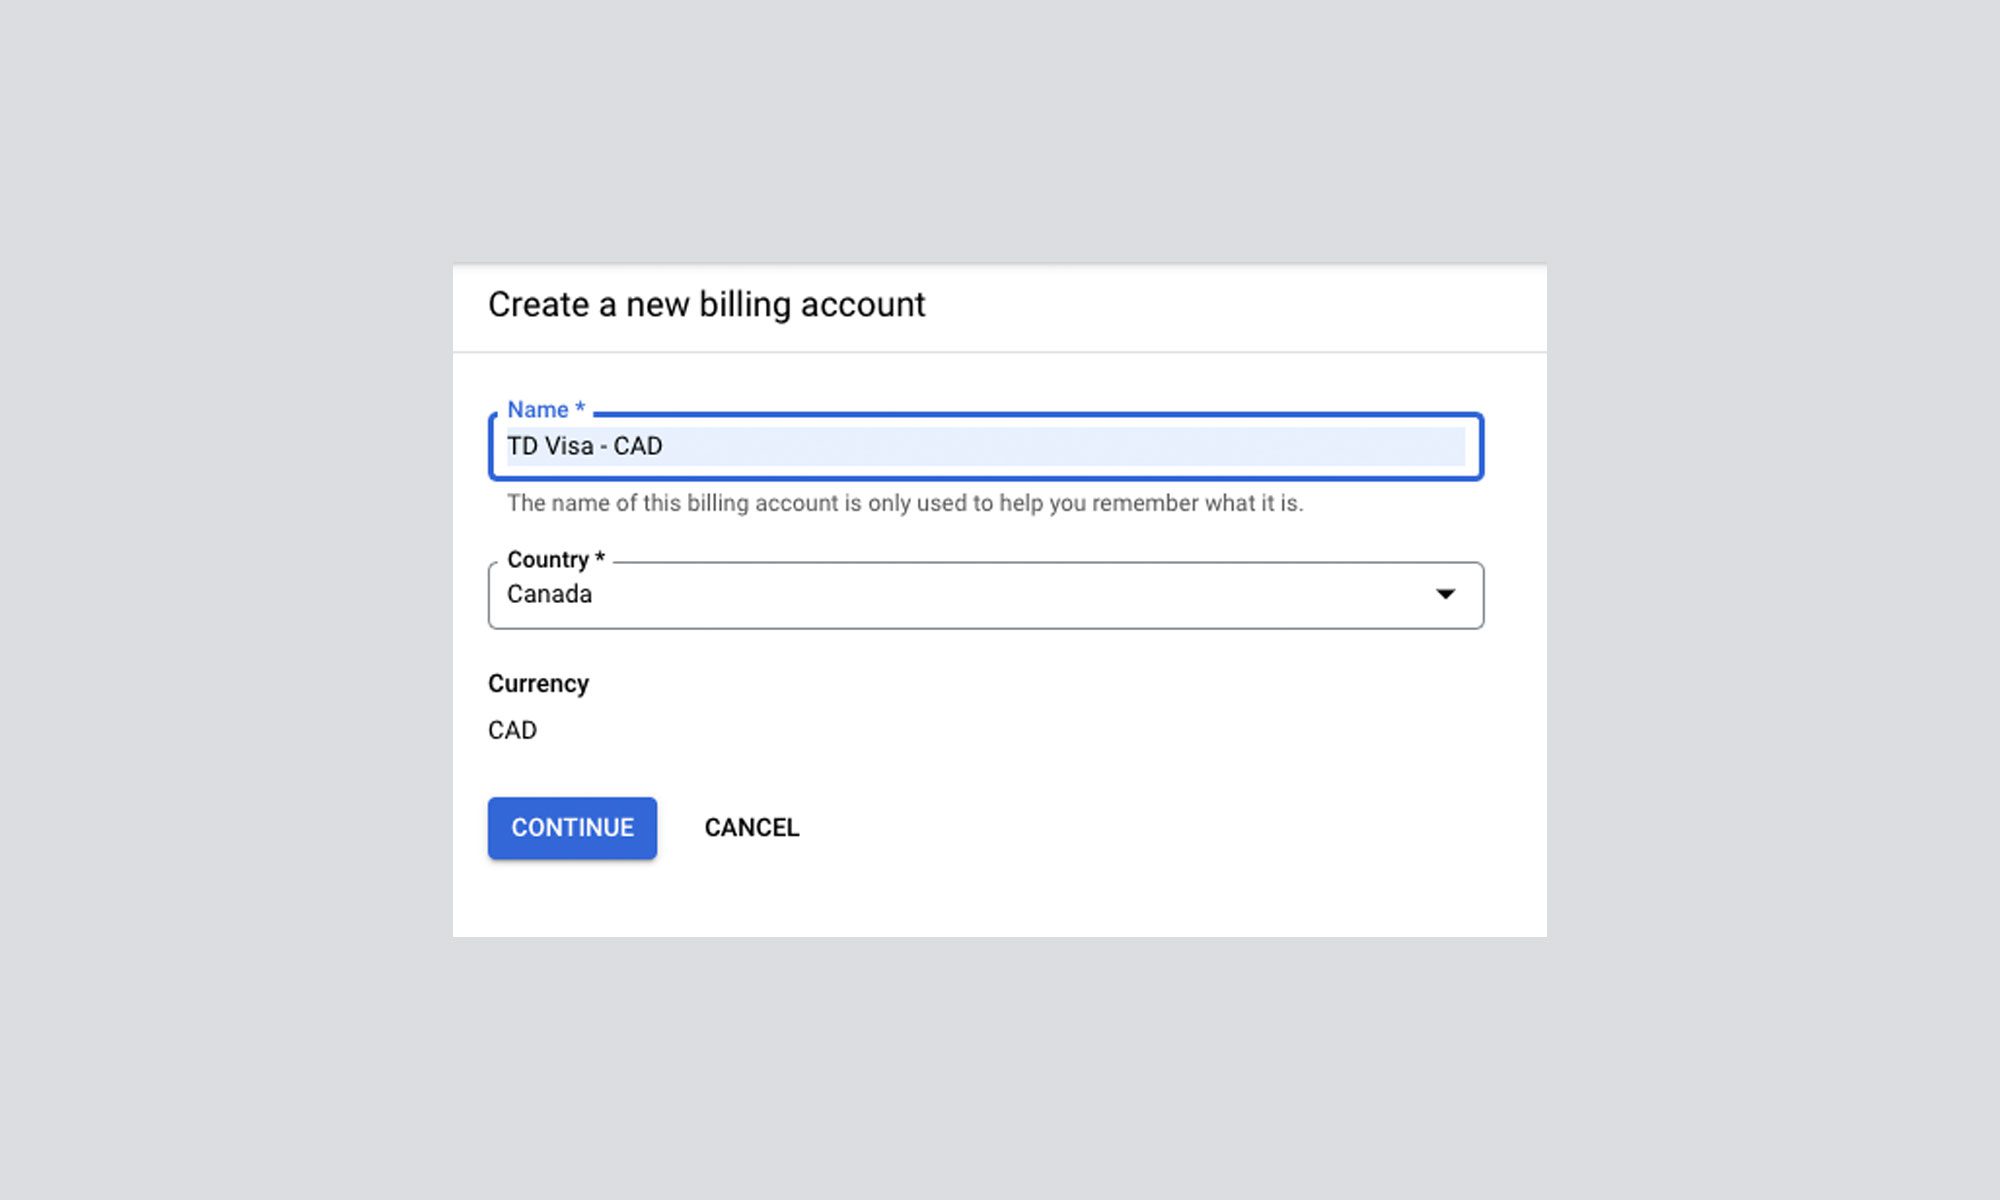
- Complete the Set up your billing profile page with your business payment details and click Submit and enable billing.
- Return to tagmanager.google.com.
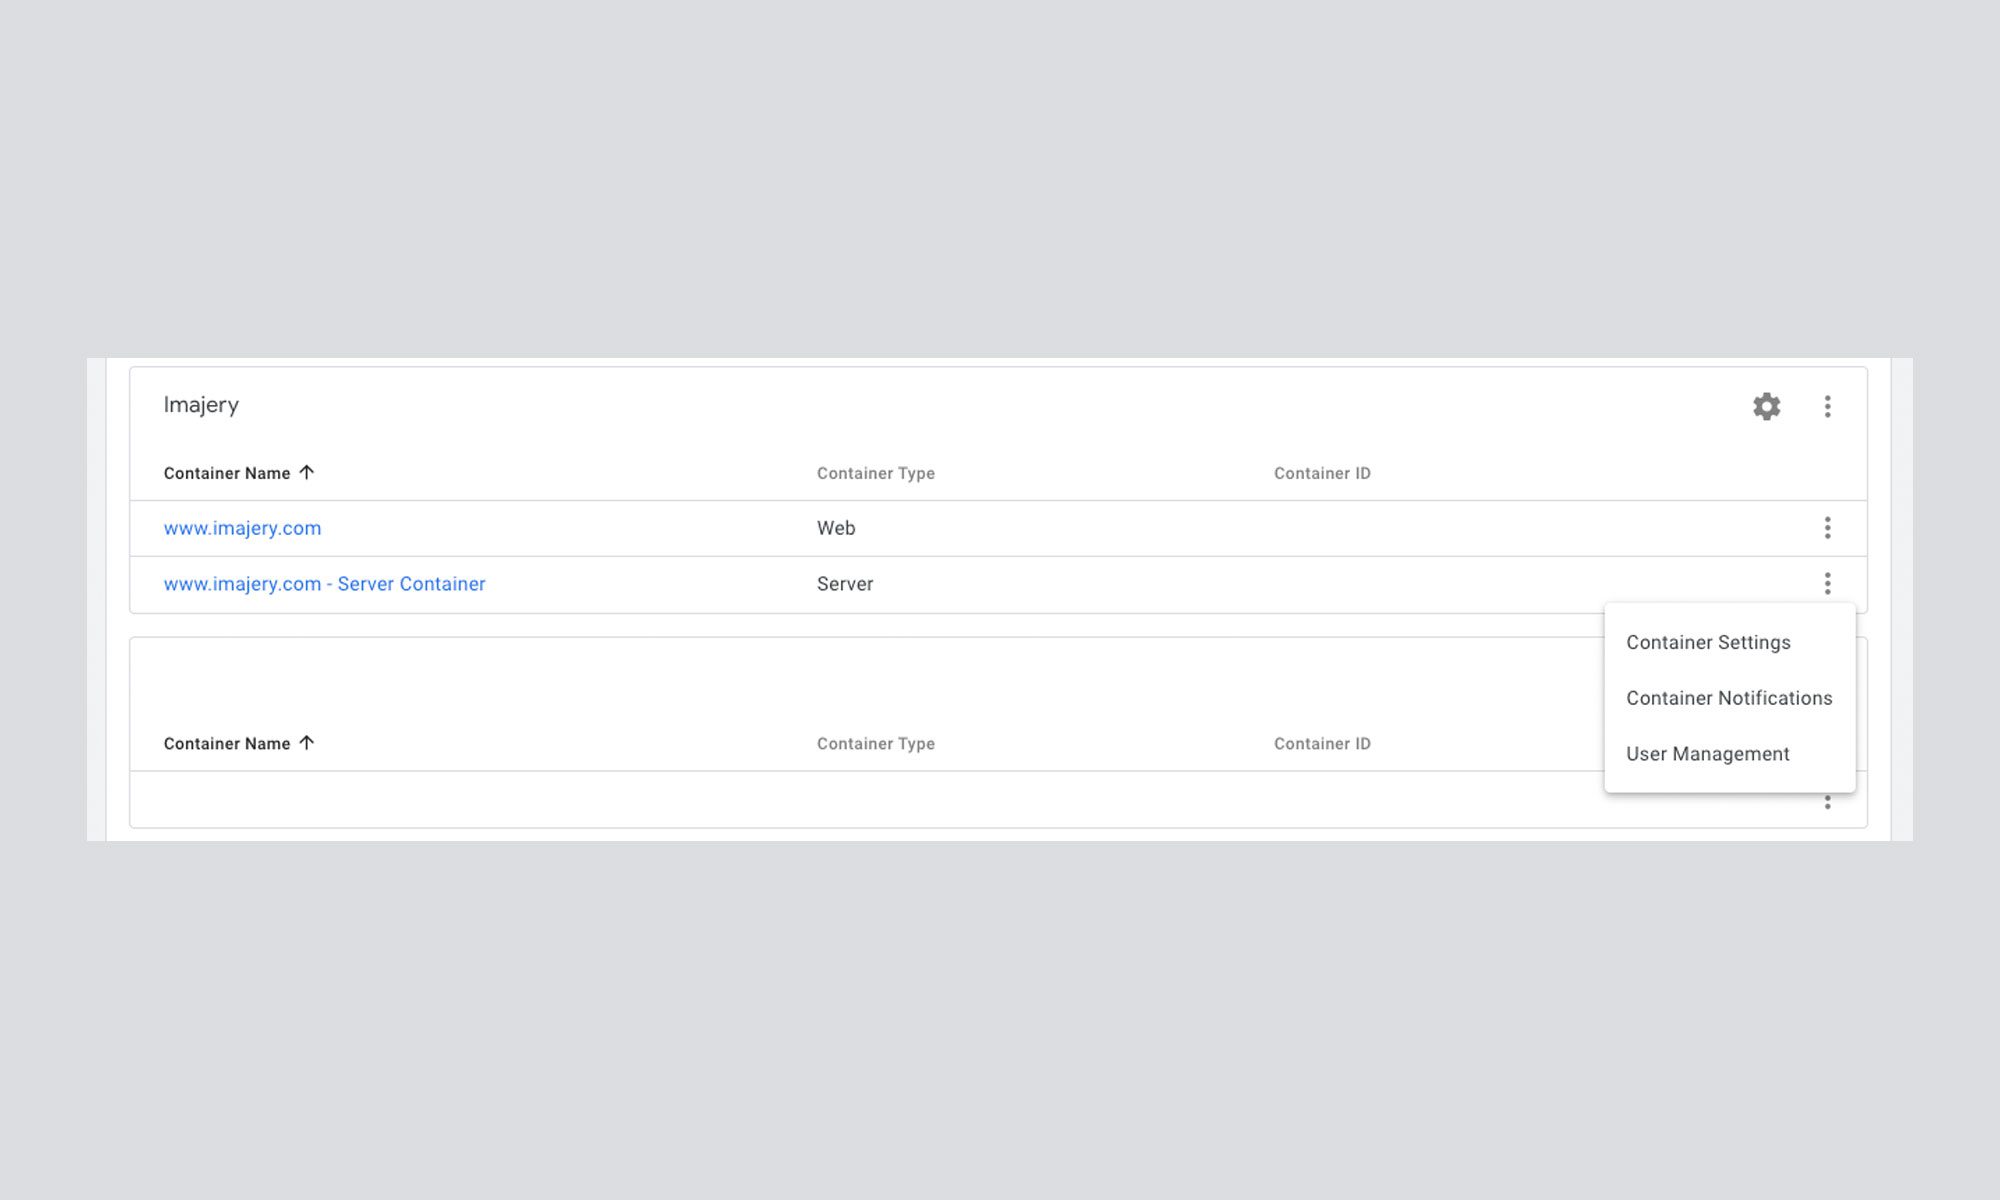
- Click ⋮ next to your server container and select Container Settings.
- Click Set up your tagging server, select Automatically provision your tagging server, and attach your newly created billing profile.
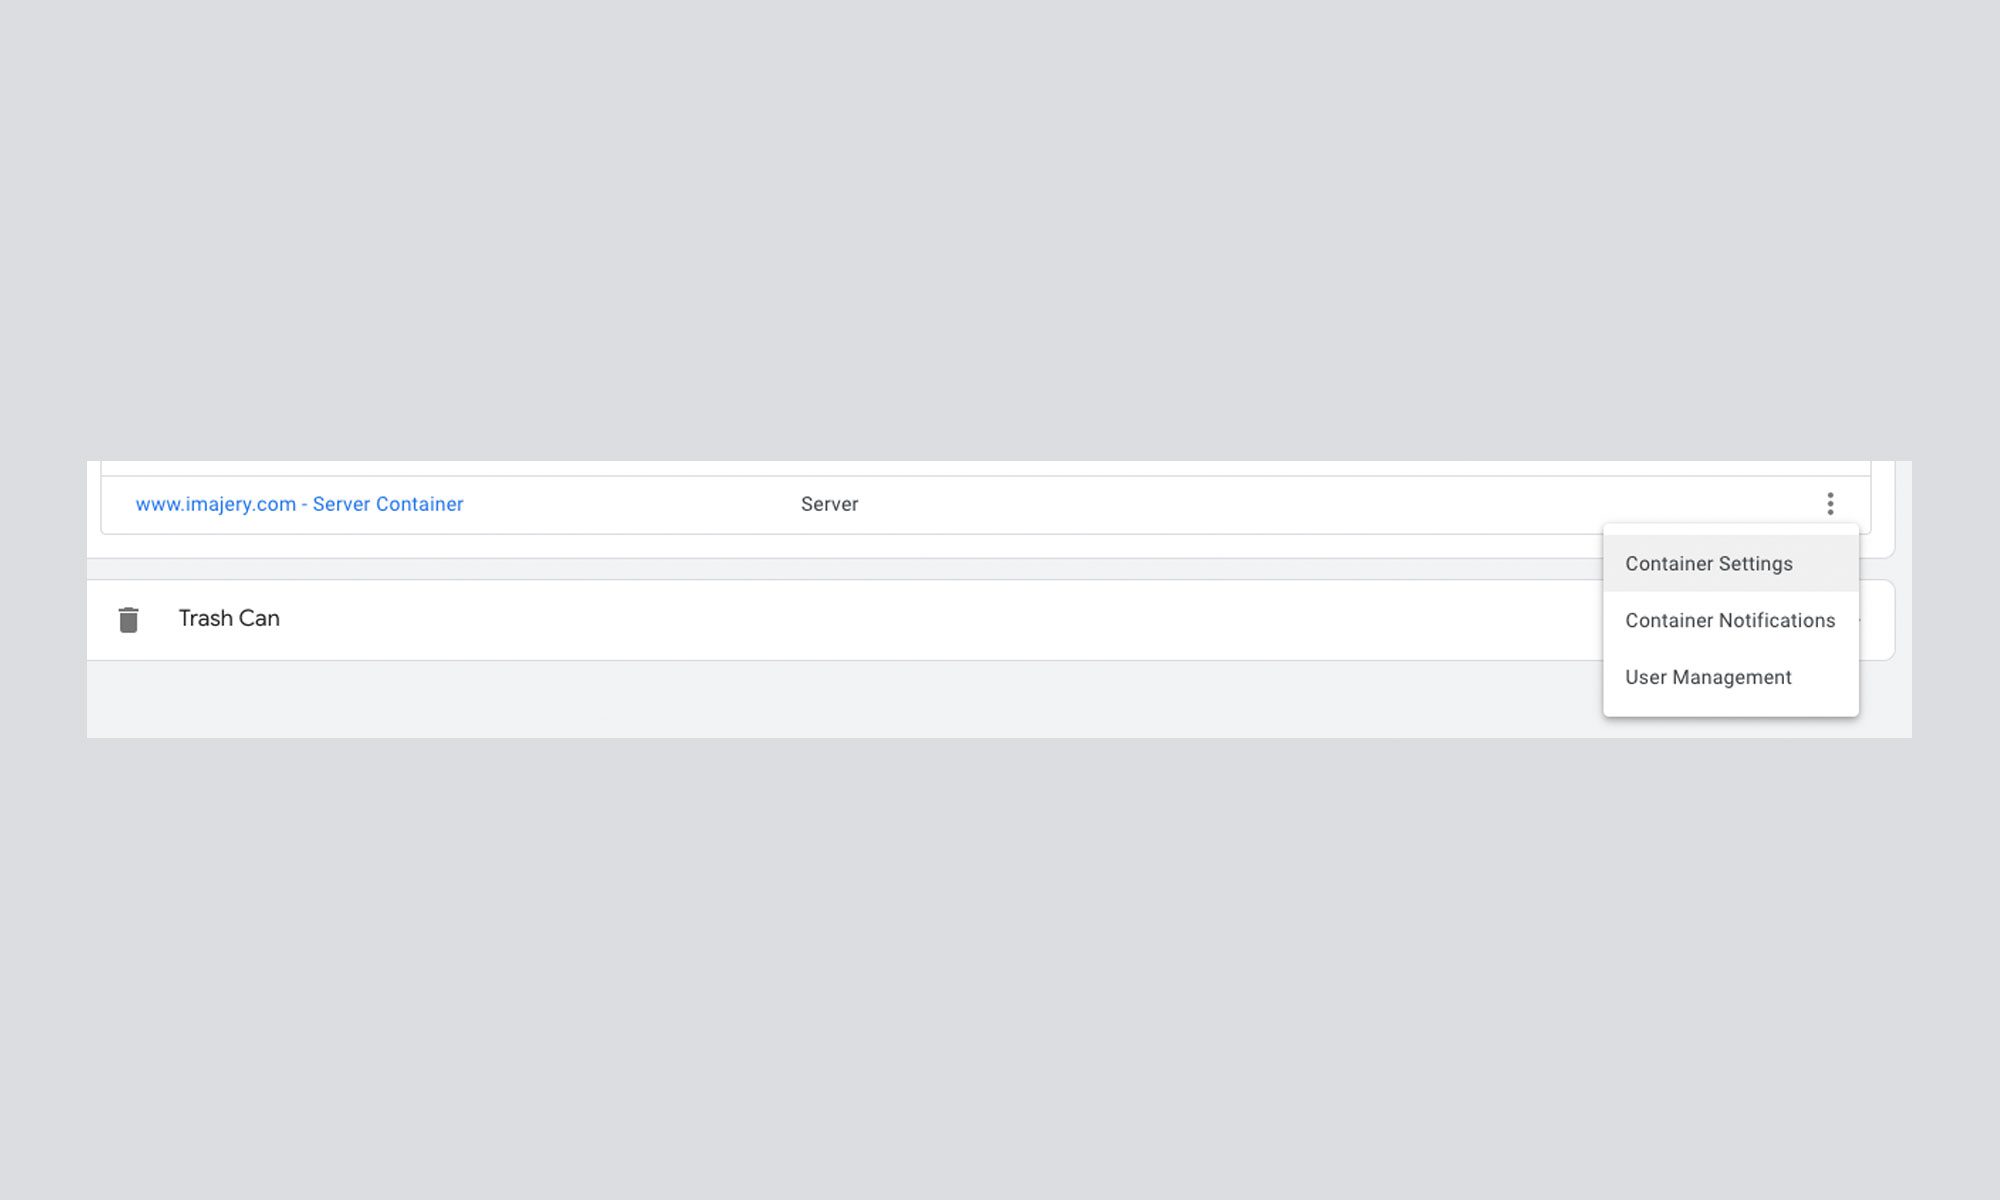
3. Add a Custom Domain to the Server Container
Because ad blockers and privacy extensions frequently flag default Google Cloud App Engine URLs, routing measurement through a custom subdomain (e.g., metrics.yourdomain.com) ensures seamless first-party data flow.
- Navigate to the Google Cloud Console.
- Select your server container project from the top dropdown menu.
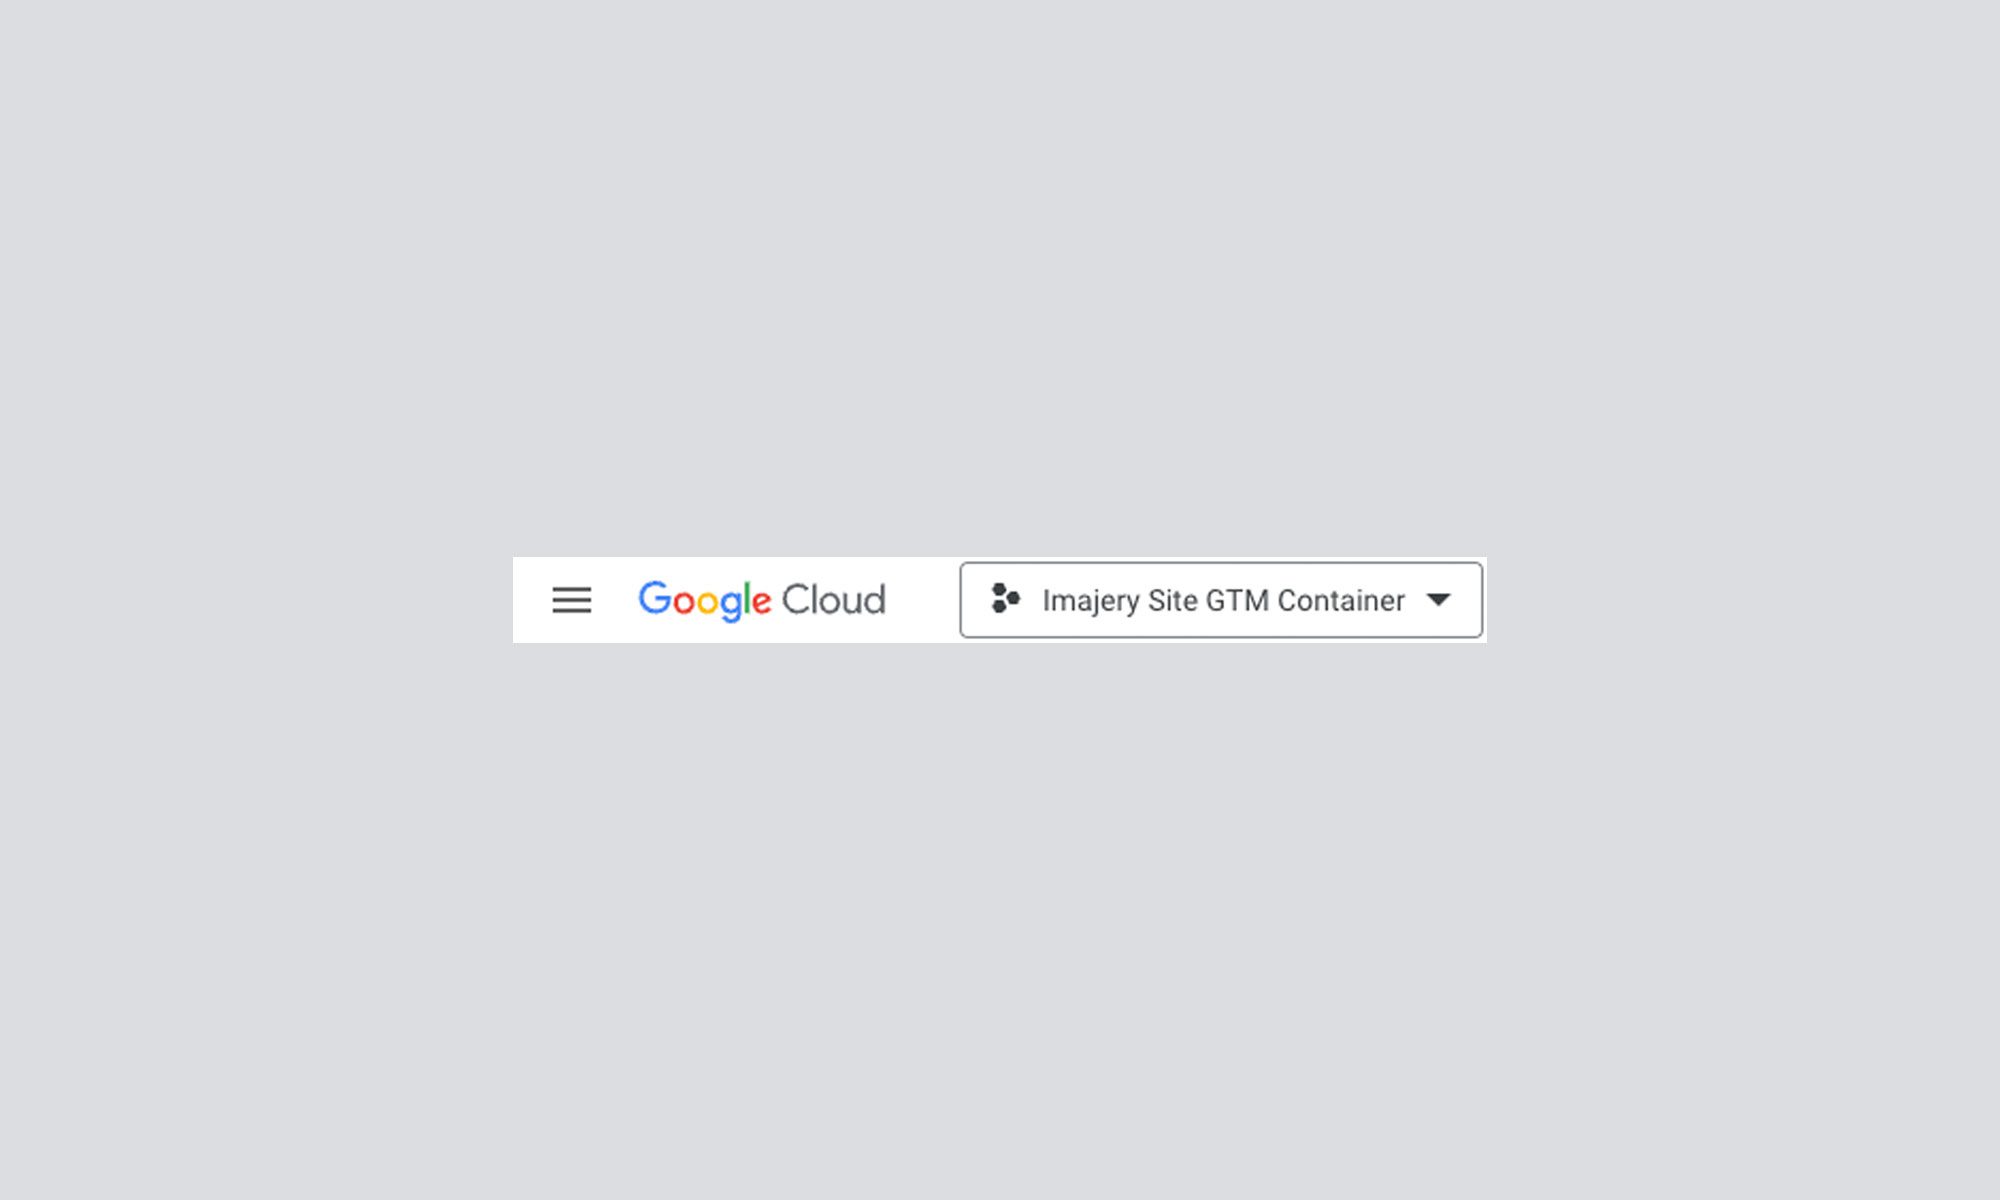
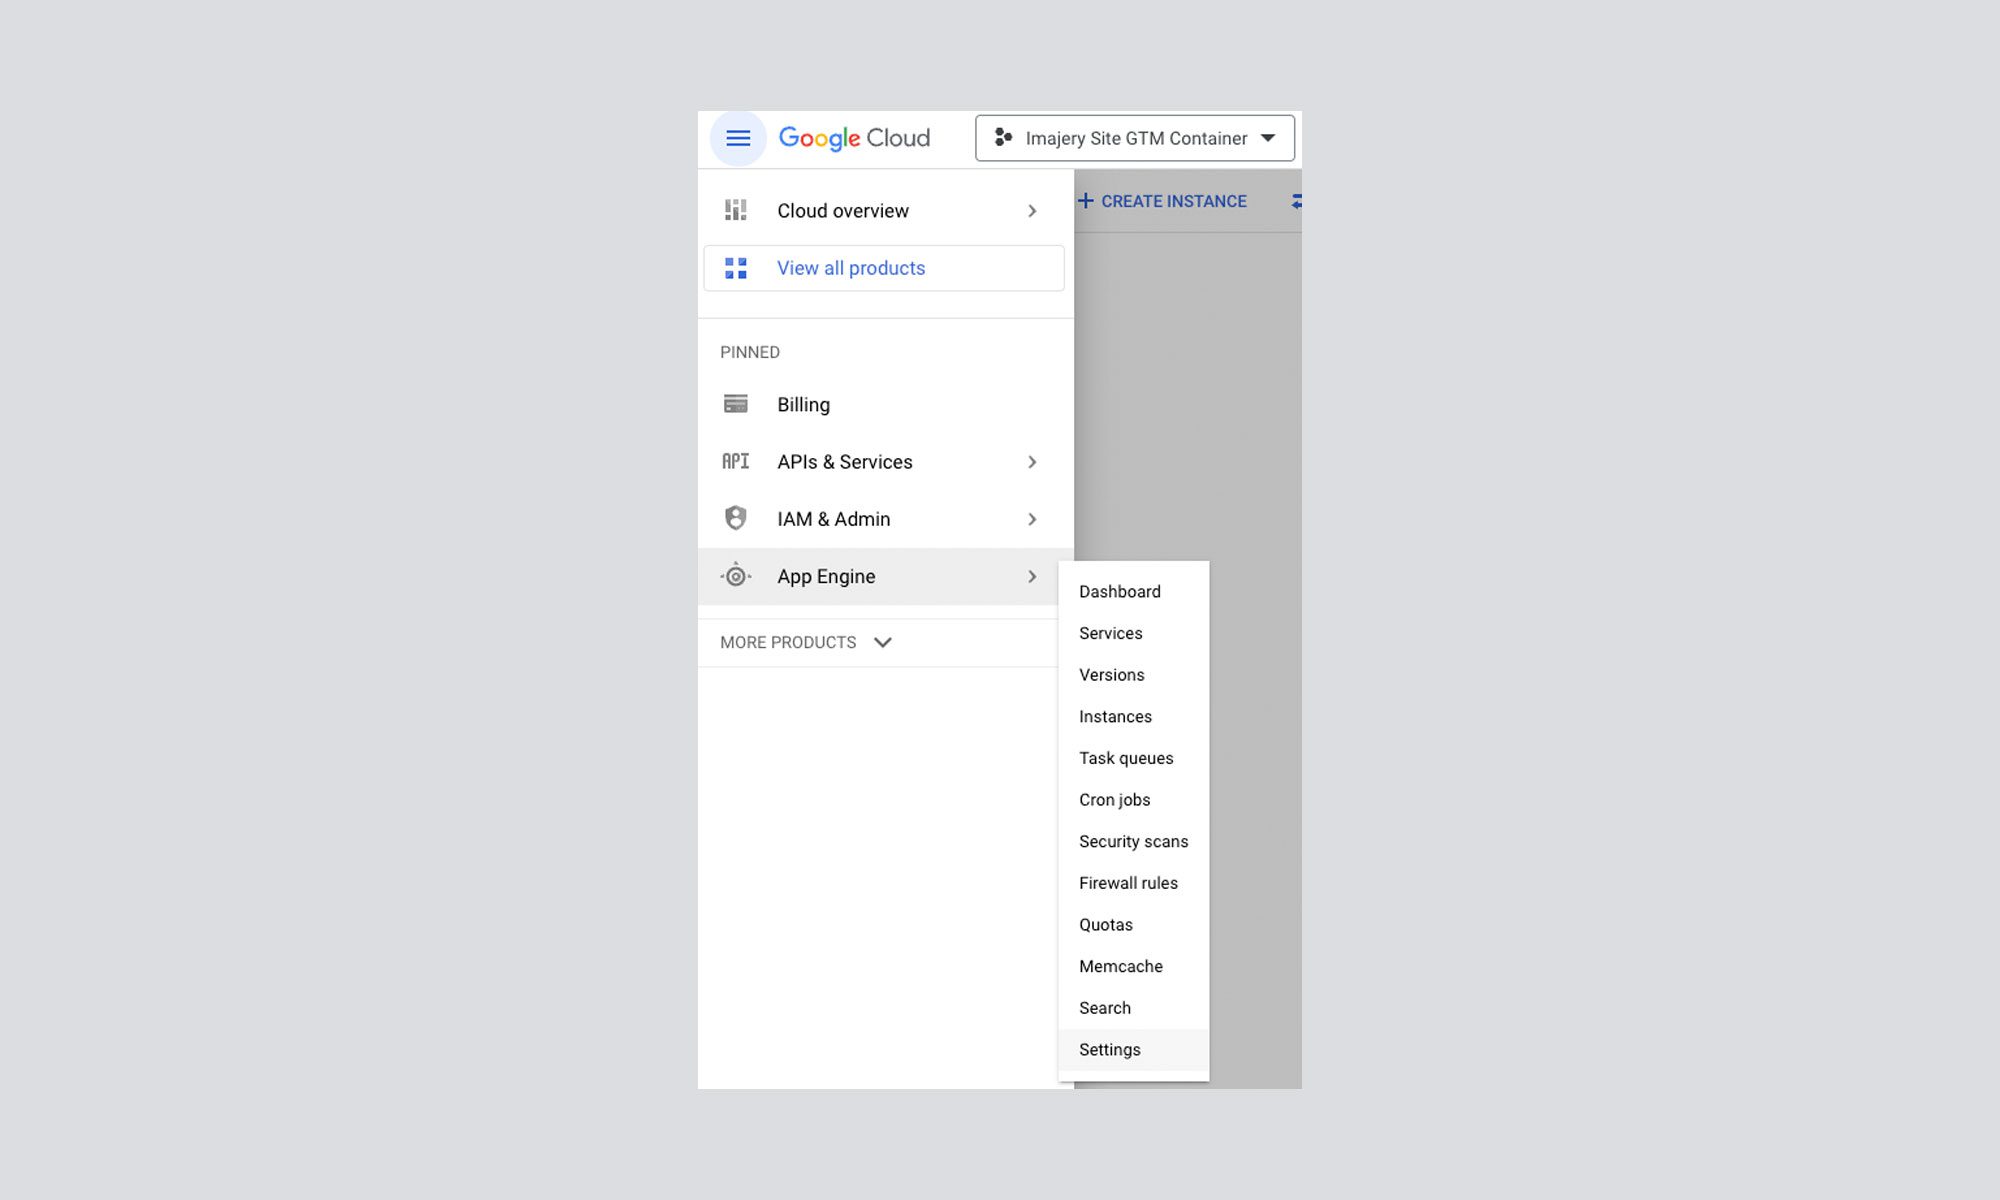
- Click the navigation hamburger menu in the upper-left corner and navigate to More Products → App Engine → Settings.
- Switch to the Custom Domains tab and click Add a custom domain.
- Select your root domain from the dropdown. (If your domain is not listed, see the Verify a New Domain section below).
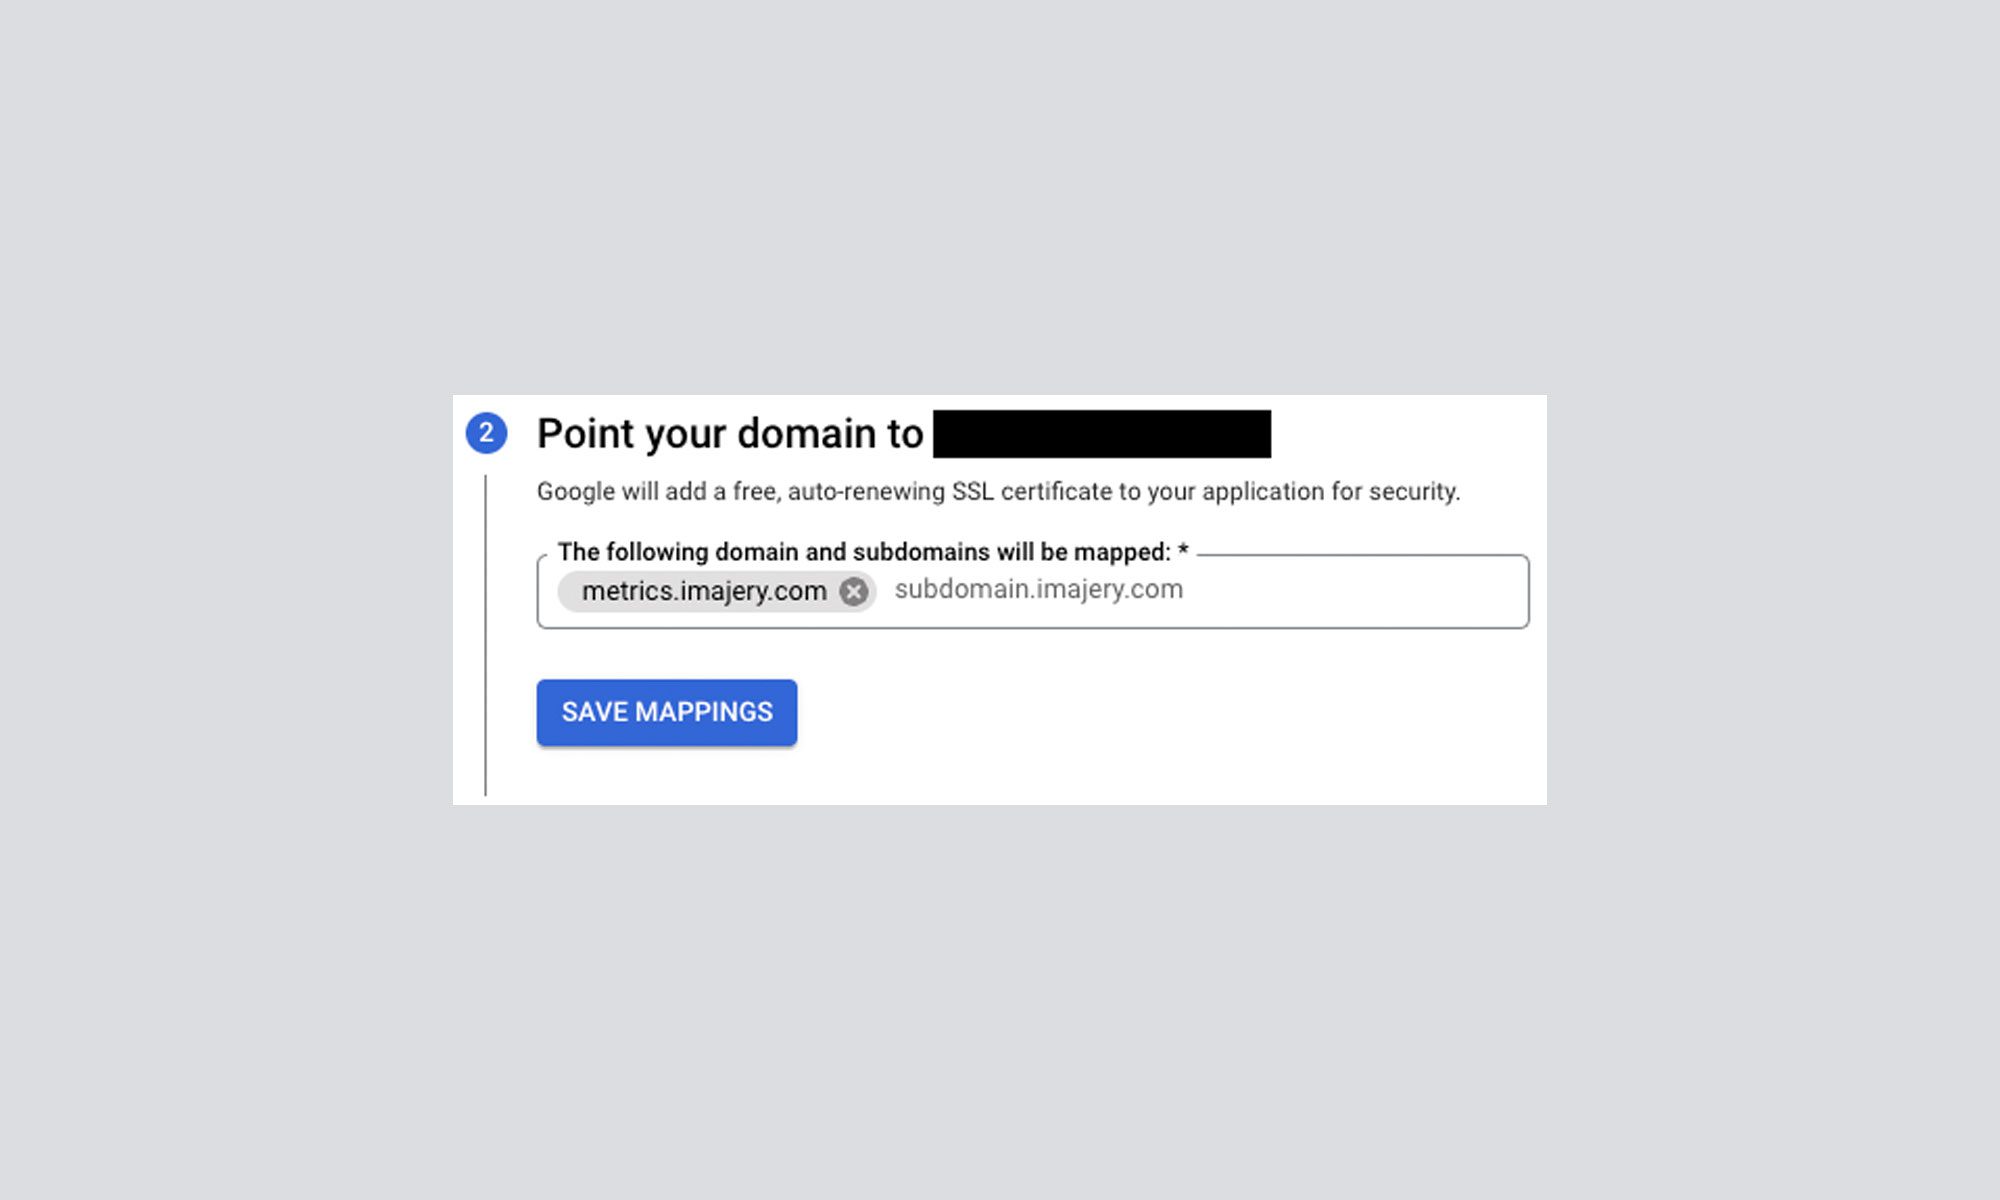
- Enter your chosen custom subdomain for the tagging server (e.g.,
metrics.yourdomain.com) and click Save Mappings.
- Once saved, click Continue. Copy the provided DNS records (typically CNAME or A/AAAA records) and add them to your domain’s DNS provider (Cloudflare, GoDaddy, Route53, etc.).
- Click Done. Google will provision a free managed SSL certificate within 15–60 minutes.
- Return to Google Tag Manager, click ⋮ next to your server container, and choose Container Settings.
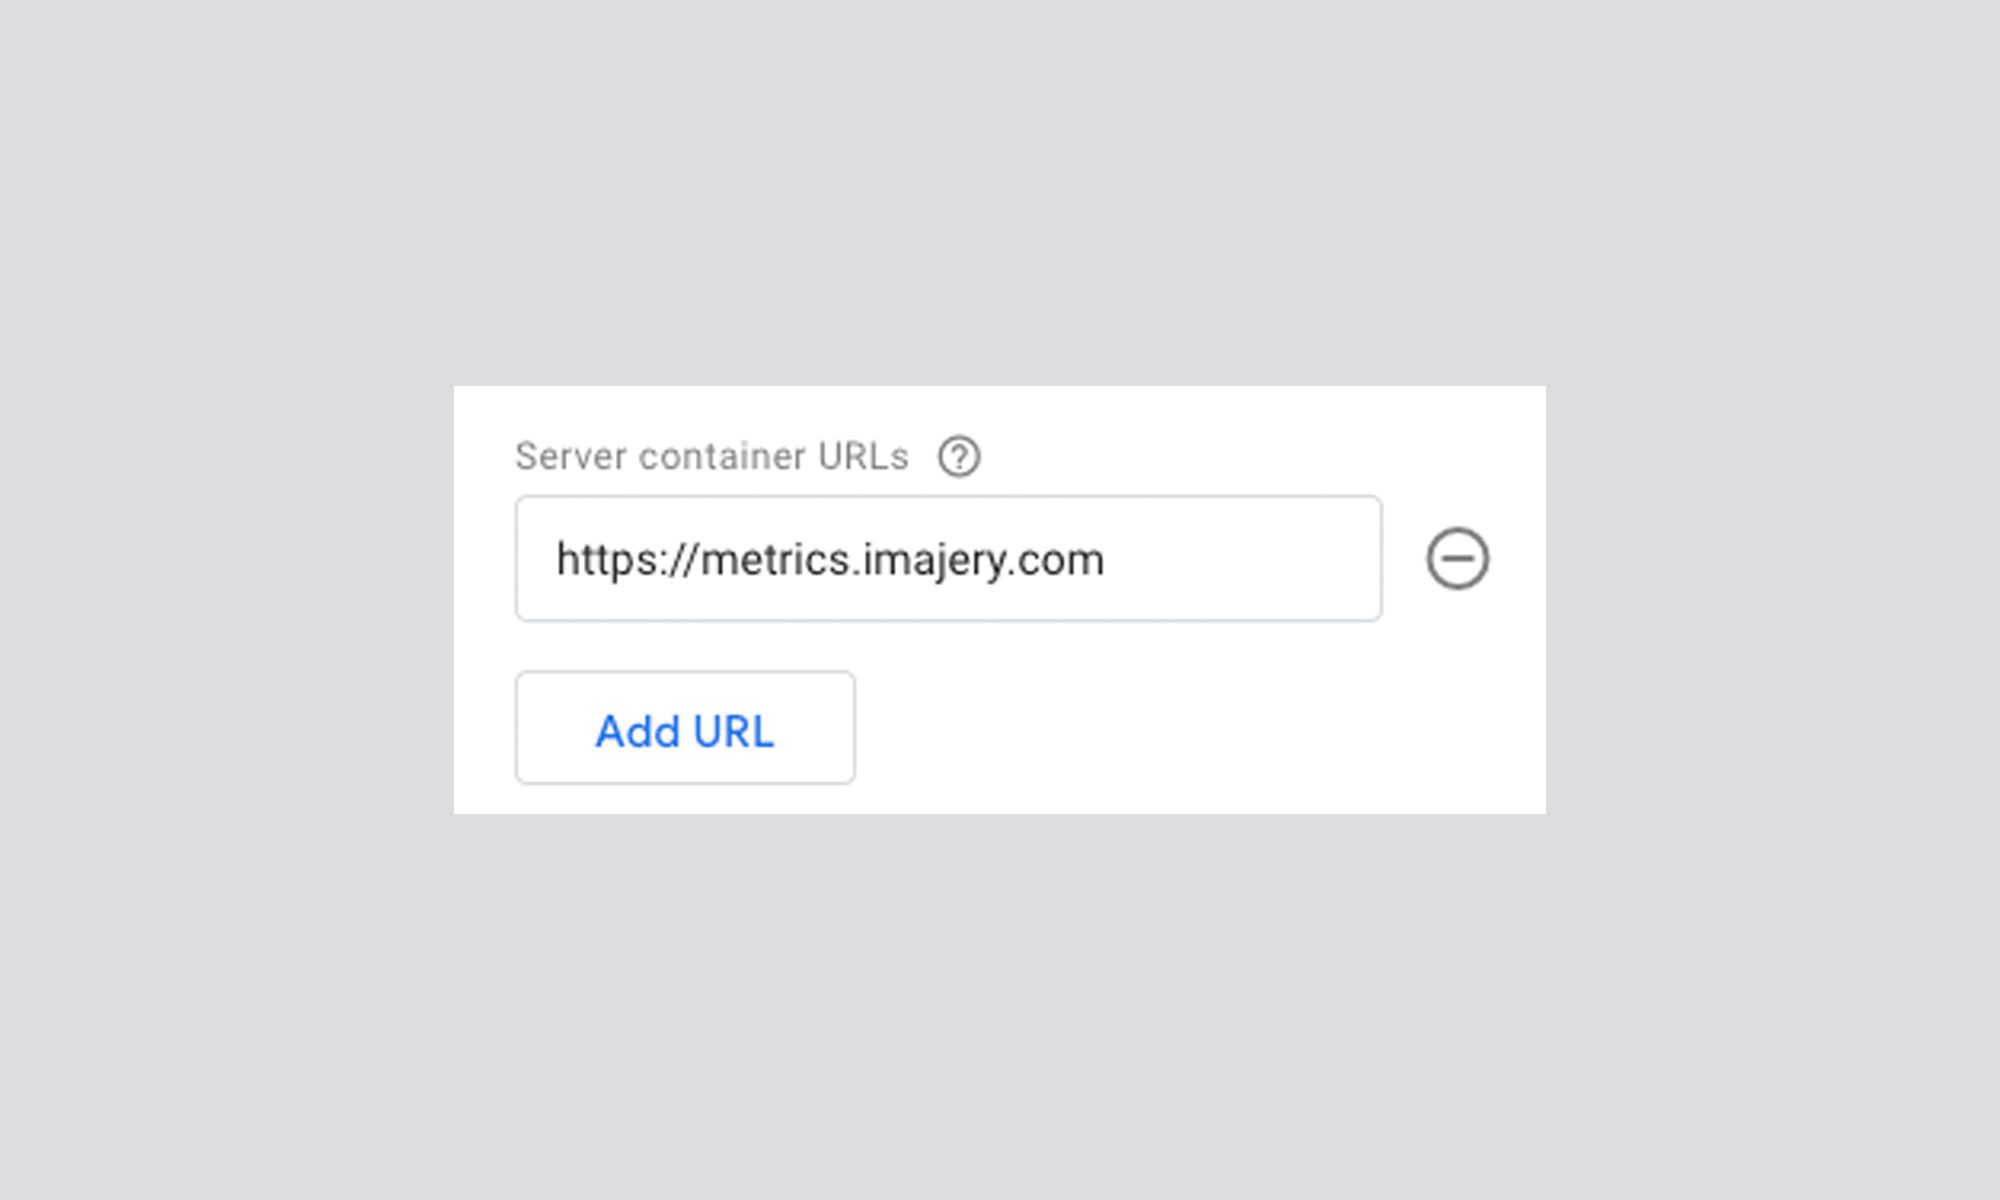
- Under Server Container URLs, click Add URL, enter your full secure subdomain URL (e.g.,
https://metrics.yourdomain.com), and click Save.
4. Verify a New Domain (If Not in Google Cloud)
If your root domain has not yet been verified in your Google Cloud account:
- Select Verify a new domain from the domain dropdown menu.
- Enter your root web domain and click Verify.
- In the new window, complete site ownership verification via DNS TXT record or HTML file as outlined in Google’s Site Ownership Guide.
- Return to your Google Cloud App Engine tab and finish adding your custom subdomain.
For deeper technical specifications, refer to Google’s official server-side Tag Manager documentation.
Looking to implement server-side tracking, GA4 measurement, or custom Conversion APIs without breaking your live tracking? Explore our data analytics and tracking services or claim a free measurement audit with our engineering team today.